Monday, June 29, 2015

Tatte Bakery- Beacon Street, Brookline

These meringues looked to die for. Not to mention that each one was the size of a grown man's hand!
 A little mint lemonade to go with that brioche and cinnamon bun?
 I had my first ever pastrami sandwich. Definitely a future repeat.  
 I may have taken a bite or two of Alexi's pistacio mousse cake. So light and decadent, but only for those who loooooove pistacio. 
 Three friends, three treats.
 Just kidding; we couldn't let a slice of chocolate mousse cake pass us by. 
 Then naturally a walk down Beacon Street was in order on such a lovely evening out. 
Good friends, good treats, can't ask for a better summer evening. 

Thursday, June 25, 2015

Cafe Nero - Jamaica Plain

 The end of the workday comes and the best way to end it is catching up with a friend and having a little cafe au latte at Cafe Nero in Jamaica Plain.
The working man in question. Those eyebrows speak sass fluently.
When he jets off to California in less than two months I'm going to miss getting together with this fellow. Maybe a visit to sunny California will be in order this fall eh? 

Monday, June 22, 2015

Portland Maine-Boone's


 A father's day treat: my Baba loves seafood. 

The best way to start a seafood party is with mussels.
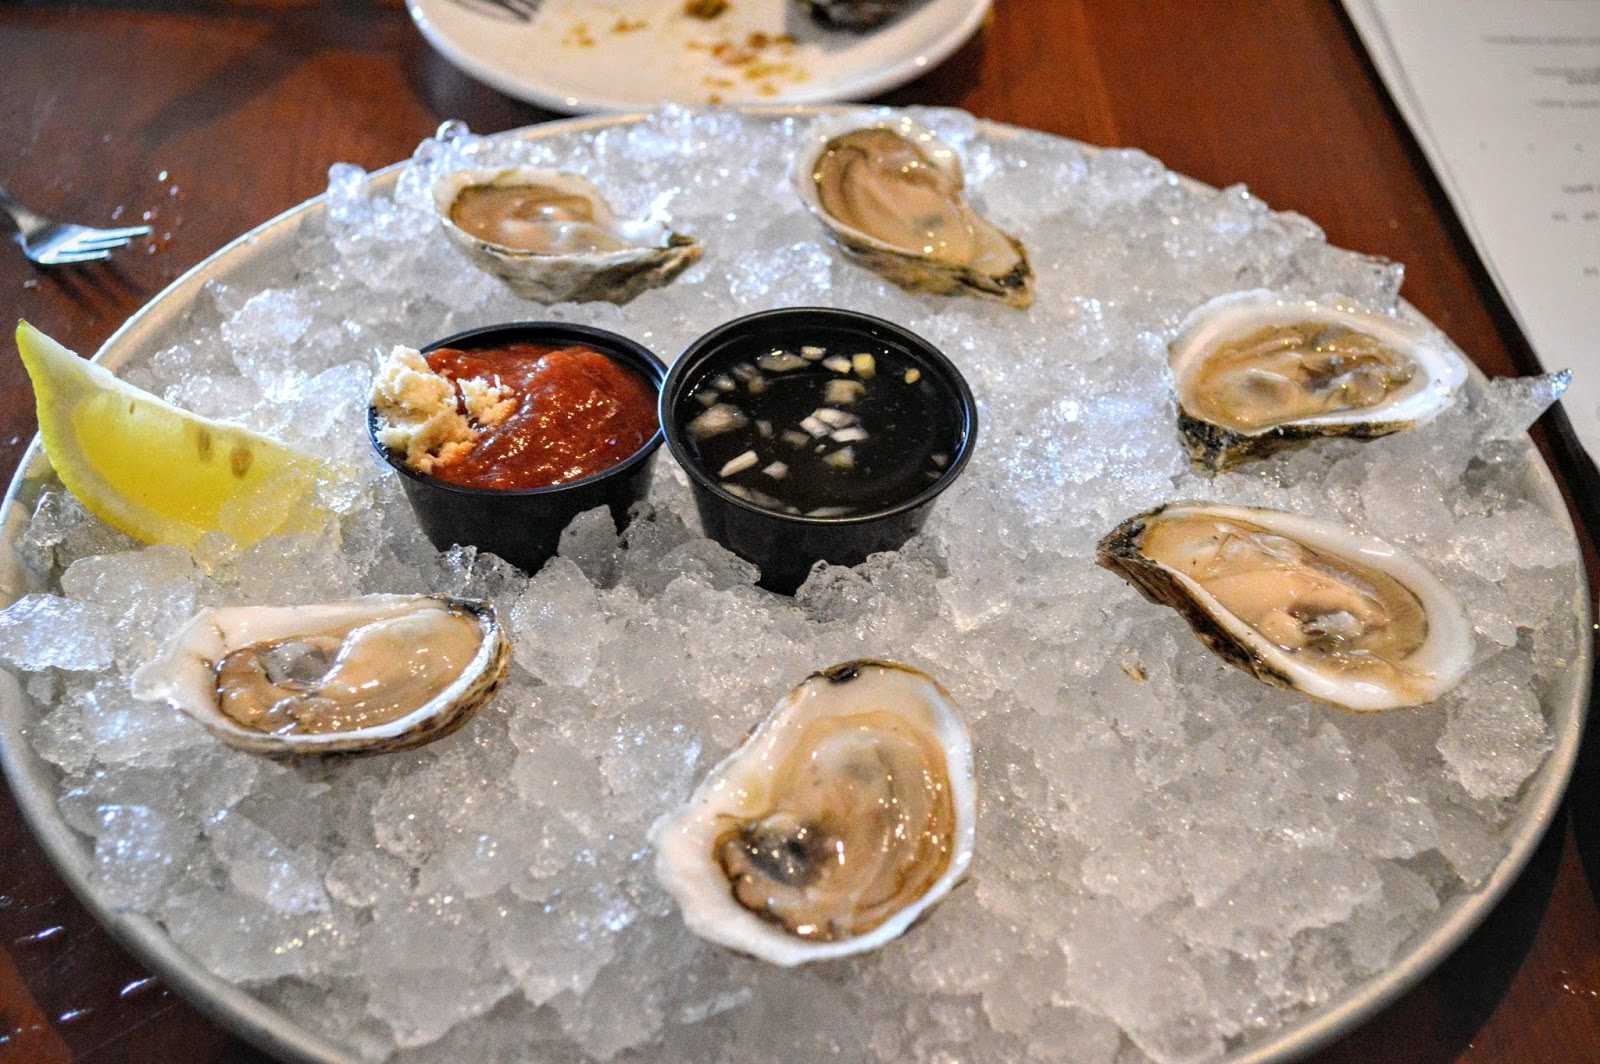
 And maybe a few oysters.
 My first oyster; may it be the first of many!
 Wowza! Does that swordfish look delicious or what!?
In Maine this is considered decoration.
Lobster poutine...ahhh lobster. 

Monday, June 15, 2015

Wedding Cake Photos

 Oh sweet cake how I love thee
 Nature is sometimes the best decoration.
 Layer after layer of deliciousness.
 Simple beauty. 
 The kind of icing where nobody would know if you took a swipe or two with your fingers for a little taste test. 
 Have a slice.
 As the slices go, slowly the tower crumbles.
 It's important to share the goodness. 
 My slice...all mine.
 The cake is delicious without being overbearing in flavor. A very light cake.
 But the icing...Wowza!
 Mmmmmm.
 Quite the spread. 
Cake is where it's at. 

Thursday, June 11, 2015

Wedding Cake "Prep"

 Lots of pans filled with LOTS of batter.
 Waiting for the precious babies to cool down.
 Putting a little bit of icing on the board underneath the cake helps it stick.
 The bottom layer mounded with icing. Half that icing gets scraped off, but I find it easier to be generous in the beginning and take off as I go.
 See. Slathered on, and not beautiful. It perfectly fine.
 See how I ended up with space in between the icing and the layers, I should have used more. 
 This cake was heavy so supports were mandatory. Each layer had four supports, and on top of those supports I put another cardboard base to start the next level.
 Notice how you can see the cardboard. I just gobbed on more icing and it vanished. Poof.
The final product before decoration. 
Wilton Almond Cake: Makes 7/12-8 cups of batter
Ingredients:
  1. 1 1/2 cups butter softened
  2. 2 1/2 cups sugar
  3. 5 eggs 
  4. 1 tsp vanilla
  5. 3/4 almond extract
  6. 3 cups flour
  7. 3/4 tsp baking powder
  8. 1/4 tsp salt
  9. 1 cup whole milk
Note: I made this recipe 4 times
Icing
  1. 1 cup softened butter
  2. 1 tsp vanilla
  3. 4 cups powdered sugar
  4. 2 tbsp milk
Note: I had to make this recipe 5 times in order to cover the whole cake. 

Instructions:

  1. Preheat oven to 350 degrees. 
  2. In a stand mixer cream together the butter and sugar.
  3. Add in the vanilla and almond extract; beat well.
  4. Add one egg at a time and mix until fully incorporated. If you don't you lose volume.
  5. Add in salt and baking powder. 
  6. Add in half the flour; keep the mixer on a low speed. Add the milk until fully incorporated and then add the second half of the flour.
  7. Grease pans WELL. My base pan sizes were 12". I used a full recipes worth of batter to fill each of the two individual pans. Bake for 55-60 minutes. 
  8. I used half a recipe for each of my 10" pans. Bake for 55-60 minutes.
  9. I used 2 1/2 cups batter for each 8" pan and 1 1/2 cups batter for the 6" pans. I baked these four pans together for 40 min each. 

Sunday, June 7, 2015

Lemon Pound Cake

 Cake for breakfast again... start the morning off right. 
 If I eat it with fruit then it's okay. 
Lemon desserts are some of the best kind. But you got to go all the way. No "hint" of lemon flavor here.
Icing is the whole point of eating cake.  
 I nibble as I work. The usual. 
  
Lemon Pound Cake: Makes one loaf
Ingredients:
  1. 1 3/4 cups flour
  2. 1/2 tsp baking powder
  3. 1/2 tsp salt
  4. 1/4 greek yogurt (I use Fage brand)
  5. 4 tbsp lemon juice (juice from one small lemon)
  6. 1 tsp vanilla
  7. zest from above lemon
  8. 1 cup + 2 tbsp vanilla sugar
  9. 1 cup softened butter
  10. 5 large eggs
Icing
  1. 1 cup powdered sugar
  2. 2 tbsp cream cheese
  3. 1 tbsp butter
  4. 2 tbsp lemon juice
  5. 1/4 tsp lemon extract

Instructions:

  1. Preheat oven to 325 degrees. 
  2. In a medium bowl measure out the flour, paking powder, and salt. Set aside.
  3. In a small bowl mix together the yogurt, vanilla, and lemon juice. 
  4. In another small bowl whisk together the lemon zest and the vanilla sugar.
  5. In your trusty Kitchen Aid beat together the butter and vanilla sugar/zest.
  6. Add the eggs one at a time to the mixer and wait for each to be beaten in completely. 
  7. Keeping the mixing going at a slow/medium speed, add half of the dry mixture. Add the yogurt mixture. Finish off with the rest of the dry mixture. 
  8. Grease a 9x5 loaf pan and pour the batter in. Pop that in the oven for 55-65 minutes. Now my oven currently is pretty terrible and it burns most things I put on the bottom rack, and barely seems to cook things on the top. I had to bake my loaf an additional 2o minutes...so if your oven isn't that great either, you may face this issue. 
  9. Allow the loaf to cool on awire rack a few minutes and then remove from the pan. It should slide right out. Allow to cool for a good long while before you ice it or the icing will melt off the sides...but it might not look as pretty as you want it to. Don't rush magic. 
  10. Store in an airtight container for up to 5 days or freeze for 1 month. 

Wednesday, June 3, 2015

Overnight "Cinnamon" Buns

 Pre-baked goodness.
 A proper "cinnamon" bun has more than just cinnamon. A lot more. 
 I may have eaten the center before taking this photo...
 Lots of treats for breakfast. 
 A proper "cinnamon" bun has more than just cinnamon. A lot more. 
 I may not be a big coffee drinker, but I love coffee flavored treats.
When I make something this delicious I wish I could kiss myself because I get so excited and pleased with myself. 

Overnight "Cinnamon" Buns: Makes 13-15  
Ingredients:
  1. 2 1/4 tsp active dry yeast
  2. 2 tbsp warm water
  3. 1 cup warm milk
  4. 1 tsp vanilla
  5. 1/4 cup vanilla sugar (I put whole vanilla beans in my sugar jar... which makes my sugar so fancy)
  6. 1 egg beaten
  7. 1 hefty pinch of salt
  8. 1 tsp baking powder
  9. 6 tbsp melted butter
  10. 3 1/2 cups flour
Filling Ingredients:
  1. 4-6 tbsp melted butter 
  2. 1/2 brown sugar
  3. 2 tsp cocoa powder
  4. 1 1/2 tsp cinnamon
  5. 1/4 tsp ground nutmeg
  6. 1/4 tsp ground ginger
  7. 1/2 tsp cardamom
  8. 1/4 tsp ground cloves
  9. 1 tsp espresso powder
  10. 1/2 walnuts
  11. 1/3 cup white chocolate chips 
Frosting Ingredients:
  1. 2 tbsp butter
  2. 4 oz. cream cheese
  3. 1 1/2 cup powdered sugar
  4. 1 tbsp amaretto 
  5. 2 tbsp maple syrup
Instructions:
  1. Pour yeast into a large bowl. Add warm water (not luke warm but not hot either) and warm milk. Allow yeast to foam for a minute. 
  2. Add egg and vanilla sugar into the mix and whisk well.
  3. Add melted butter and vanilla and continue to whisk.
  4. Add salt, baking powder, and two cups of the flour and using a rubber spatula, beat the mixture until smooth. Don't be afraid to slap the batter against the sides of the bowl. Show that batter who is boss.
  5. Now add the 1 1/2 remaining cups of flour and using your hands, fold and knead the dough several times until you have a lovely round orb. Don't over knead, this dough has glorious dairy will tear easier than a normal dough would.
  6. Cover your dough ball and let rise for about 1 1/2 hours. It was 80 degrees in the evening when I made this, so I barely waited 45 minutes before the dough had doubled. Woot woot. 
  7. Turn the dough on a lightly floured surface and using a rolling pin (yes I have graduated from the poor days of using a beer glass) roll out the dough into a rectangle.
  8. Take the 4-6 tbsp melted butter and using a pastry brush, coat your lovely rectangle. Be generous. Butter makes things taste delicious. 
  9. Take all the spices, brown sugar, espresso, walnuts, and chocolate and blend in a food processor or blender. (Or if you're poor and don't own fancy machinery--I use my roommates stuff, hehehe-- you mix everything by hand. You crush the walnuts between two sheets of wax paper and using your trusty beer glass roll it over the wax paper until you have broken them all into itsy-bitsy pieces! The chocolate chips can stay as they are.)
  10. Spread your filling mix evenly over the buttered dough with your hands. 
  11. Starting from one of the long ends, start rolling up the dough into a cylinder. 
  12. Cut thick two inch slices and place near each other, but still with some wiggle room, in a greased 10" cake pan. You can also use the classic 9x13 pyrex pan, but I love my cake pans more. 
  13. Let sit out for another hour to rise and then pop that pan in the fridge to hang out over night. 
  14. In the morning, take the rolls out and let them sit for about an hour. 
  15. Preheat the oven to 350 degrees.
  16. Bake for 24-26 minutes or until you see the magical slightly brown edges that let you know you have created magic. 
  17. While the buns are baking, beat together the butter, cream cheese on medium speed. Add 1 cup of the powdered sugar.
  18. Add in the vanilla and amaretto before adding the last 1/2 cup of powdered sugar. 
  19. Add the maple syrup last. Just let that gloriousness hang out while the buns bake. 
  20. When you pull the buns out, let them sit for a few minutes to cool down and then pour your frosting over. It will still probably be very melty, but allow it to harden. While you wait do jumping jacks because you will not be eating only one.